Pilzpaket Mushroom Grow Bag Review

Hello everyone! In today’s post, I would like to share about my personal journey on growing my own mushroom at home with mushroom grow bag. I always wanted to grow and harvest my own mushrooms at home and I am thrilled to be able to share my insights, tips, and suggestions with you.
Getting Started with Mushroom Grow Bags
What Exactly Are Mushroom Grow Bags?
To kick things off, what are Mushroom Grow Bags? These are specialized bags containing a substrate designed for the cultivation of mushrooms, offering a controlled environment for the mycelium to thrive. The substrate provided can ranged from fresh coffee ground, vermiculite and brown rice flour, coir (coconut fiber), wheat straw, hay and many more.
Why Choose Mushroom Grow Bags?
- Convenience at Its Best: One of the primary reasons to use Mushroom Grow Bags is their convenience. No need to fuss with soil and containers—these bags streamline the cultivation process.
- Space-Saving Wonder: Whether you’re in a tiny apartment or a spacious house, Mushroom Grow Bags fit seamlessly into any living space. Say goodbye to the limitations of traditional gardening.
Ordering Online: Starter Mushroom Grow Bags
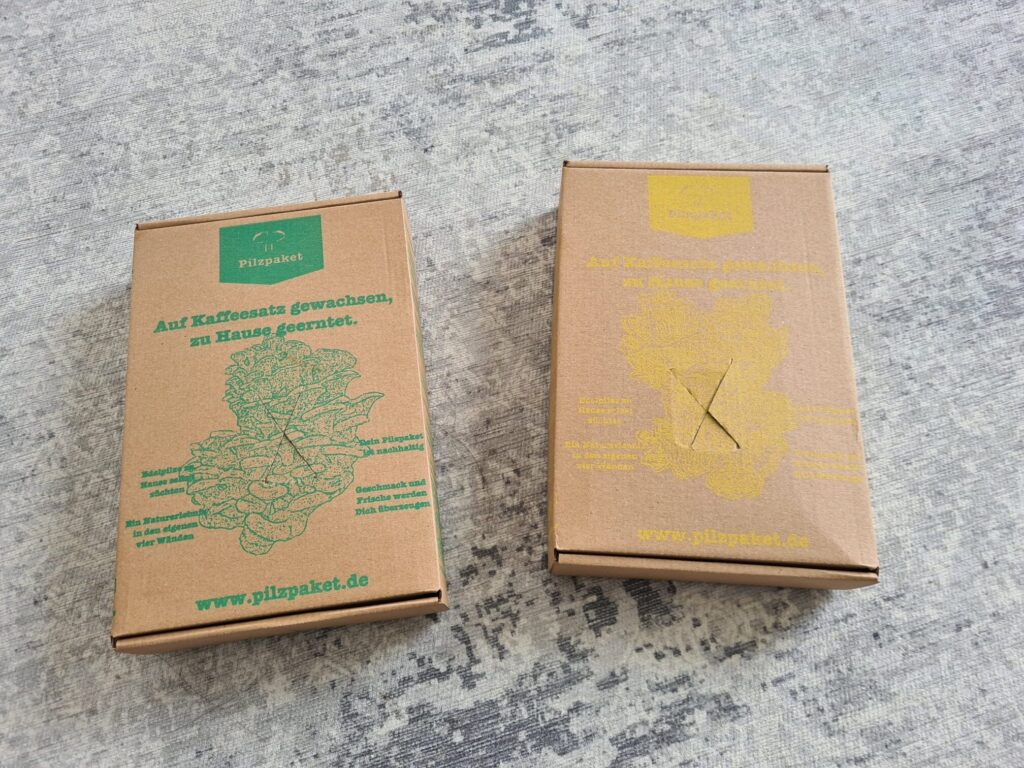
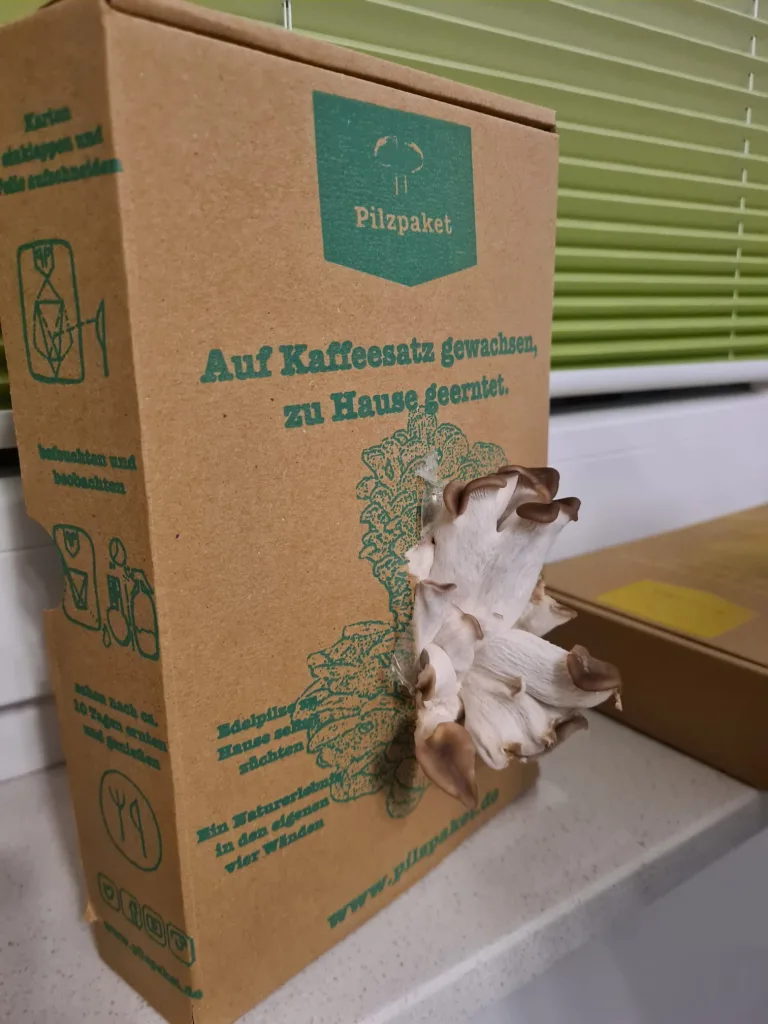
As a beginner in mushroom growing at home, I decided that the easiest way to start my journey is by purchasing a ready-to-grow mushroom substrate set. As I currently live in Germany, I only searched for reputable companies that produce their mushroom grow sets locally. Therefore I chose Pilzpaket located in Nuremberg.
I decided to order from Pilzpaket because they were having a sales where one purchases 2 mushroom substrate grow bags and get additionally 2 mushroom inoculation (for growing in your own flower pots filled with coffee ground, more on that later!). They deliver the package to your home and it looks like this:
How to grow your mushroom?
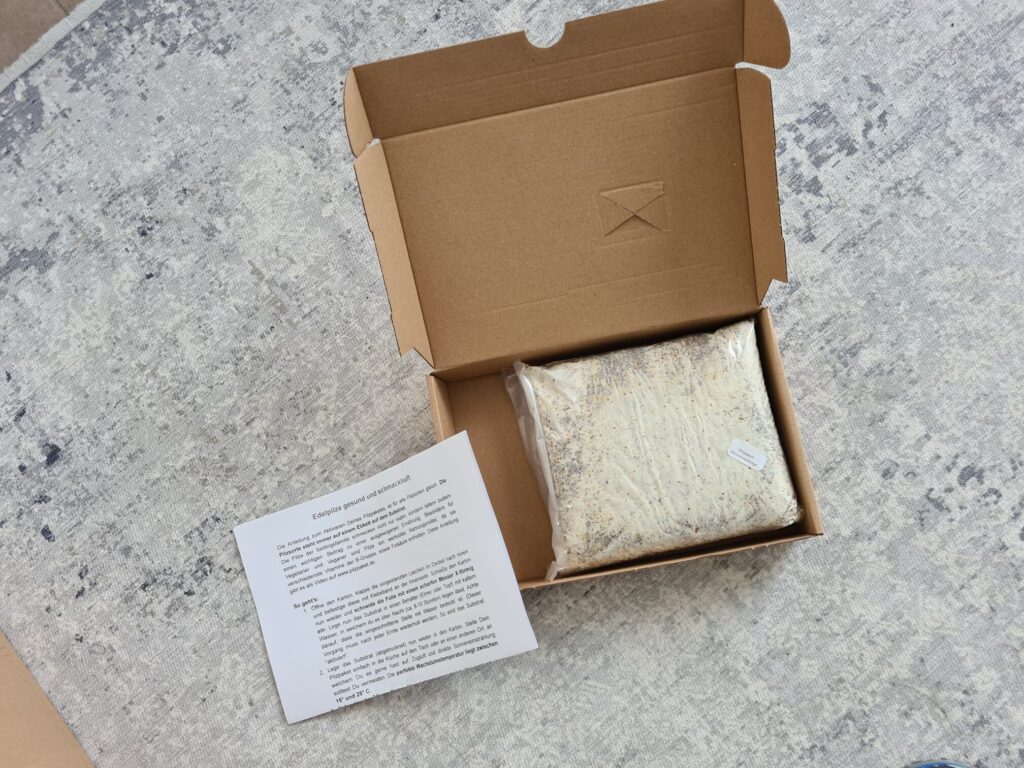
The order from Pilzpaket provided detailed instruction (a sheet of paper was included in the carton box) on how to prepare the grow bag. Here’s a quick run down on what to do, but do check out their website for more information or the video below on how to activate the substrate. Although the video is in German, it is self-explanatory and I also listed the steps below to follow the video easily.
- Take the grow bag out of the box
- Open up the flaps on the front of the carton, and tape it down. It will be the opening where the mushrooms grow out from.
- Place the grow bag back into the carton and close it.
- Then take a knife or scissor and cut an X on the grow bag from the opening on the carton.
- Take the grow bag out again, and soak it in a pot of water. Use a weigh to weigh down the grow bag to submerge the bag fully in water. Let it sit for 2 hours.
- Take the grow bag out, pat it dry and place it back into the carton.
- Close the carton, use a spray bottle and wet the opening once again.
- Mushrooms need some light to grow. Place the carton next to the window (or in a place with enough light for you to read a book) and wait for the mushroom to grow.
- As long as no mushroom is visible, mist the grow bag once every two days.
- When the mushroom emerge from the package, mist them from the top (like it is raining on them). Never get the bottom of the mushroom (or gills) wet, as that will result in rot.
How to grow your mushroom from the mushroom spawn?
As mentioned above, from the mushroom grow bag that I purchased, there was a gift with two mushroom spawn packets. With these spawns, I am able to grow mushrooms out of a flower pot with fresh coffee grounds as the substrate.

Along with the inoculation set, comes a detailed set of instructions of how to set up the flower pot mushroom growing kit. Here are the simplified steps:
- Prepare your coffee grounds substrate. It should be fresh and never older than 2 days.
- First, put a thin layer of mushroom spawn into the pot, just a few grains to cover the bottom of the pot.
- Then put a layer of coffee ground on top. It should just be a maximum of 0,5cm thick!
- Sprinkle a thin layer of lime over the coffee. This helps to neutralize the acidic properties of coffee grounds.
- Then add another layer of mushroom spawns over the lime.
- Repeat the steps of coffee -> lime -> mushroom spawn until the pot is full.
- Place the lid on the pot. This will protect the substrate and retain the moisture.

Now the flower pot is all set up! But it is not ready for mushroom growing yet! The pot has to be place in a warm room (20 – 25°C) for the mushroom mycelium to grow into the coffee grounds. This is how you create your own mushroom substrate. After a few days, the coffee grounds will be permeated by white fungal threads. When the flower pot has become full after a few days and the white mushroom mycelium has grown everywhere, the mushrooms will begin to grow on their own. Remember to moisture the mushrooms with a little water once a day as explained above.
Updates
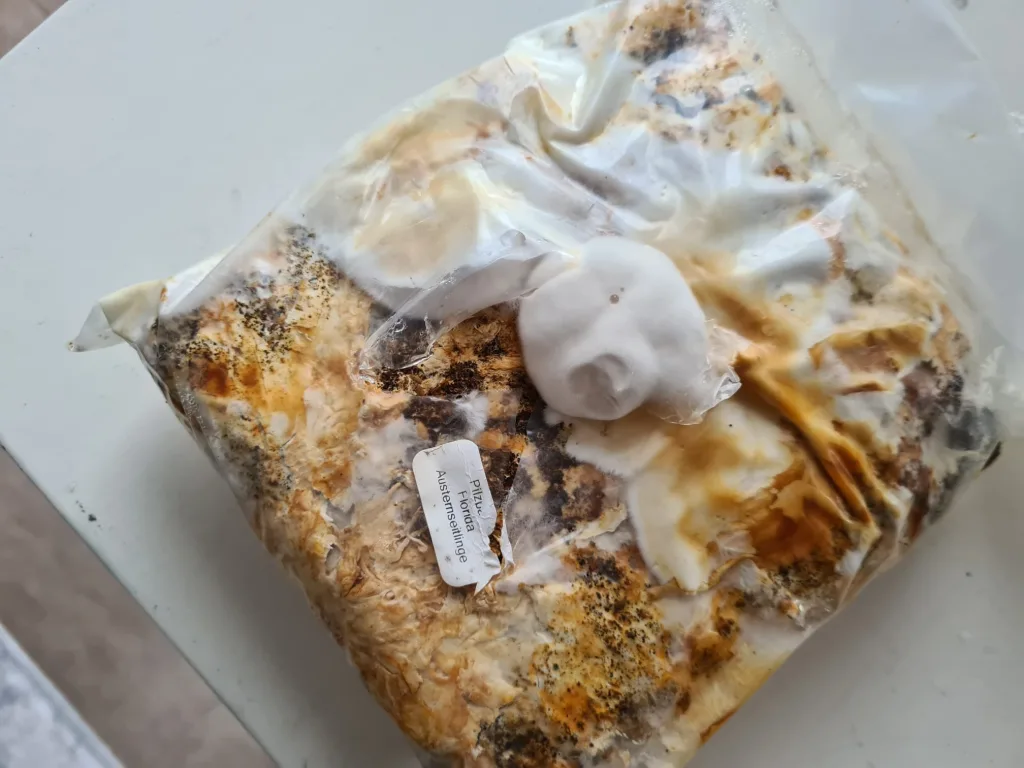
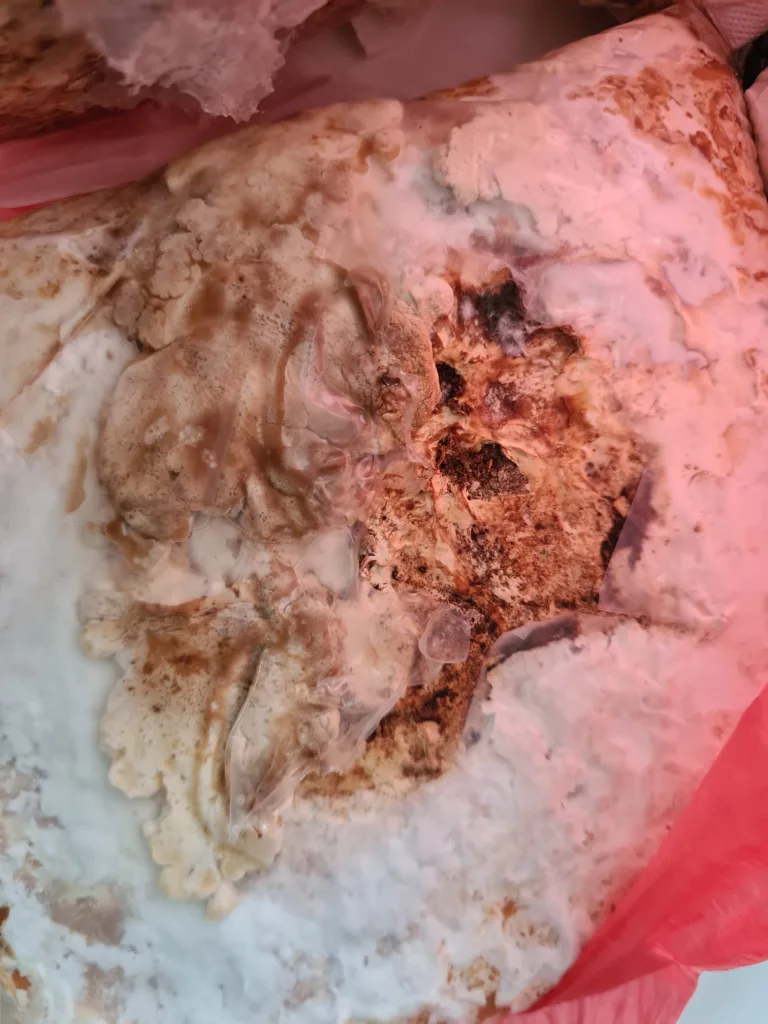
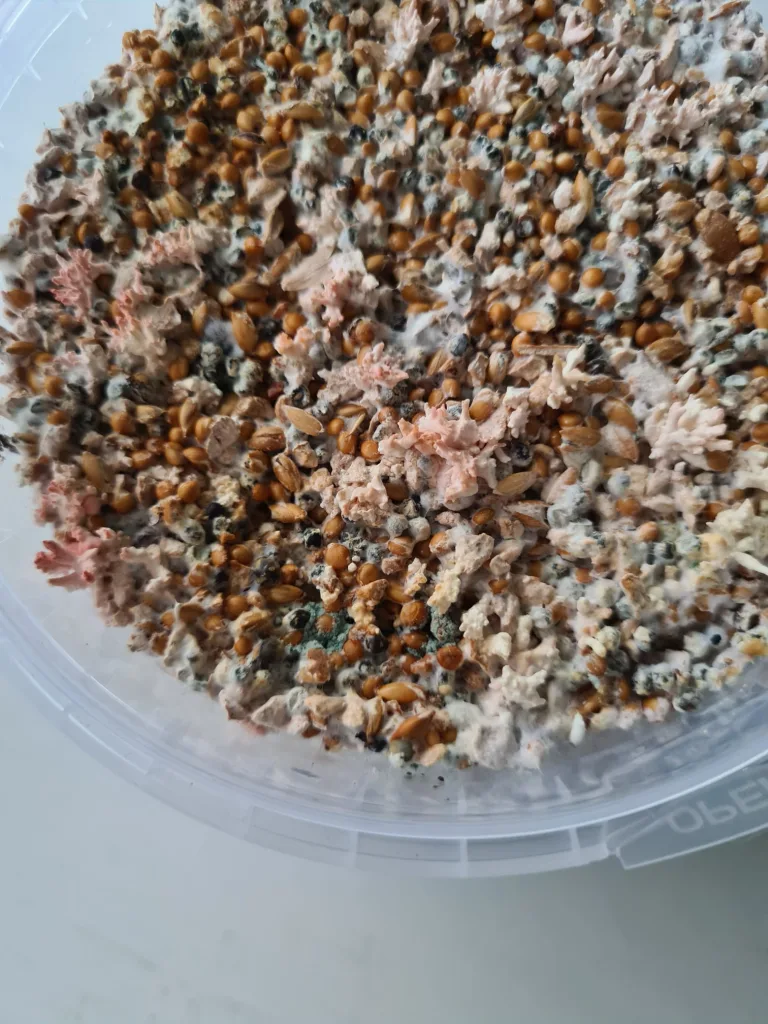
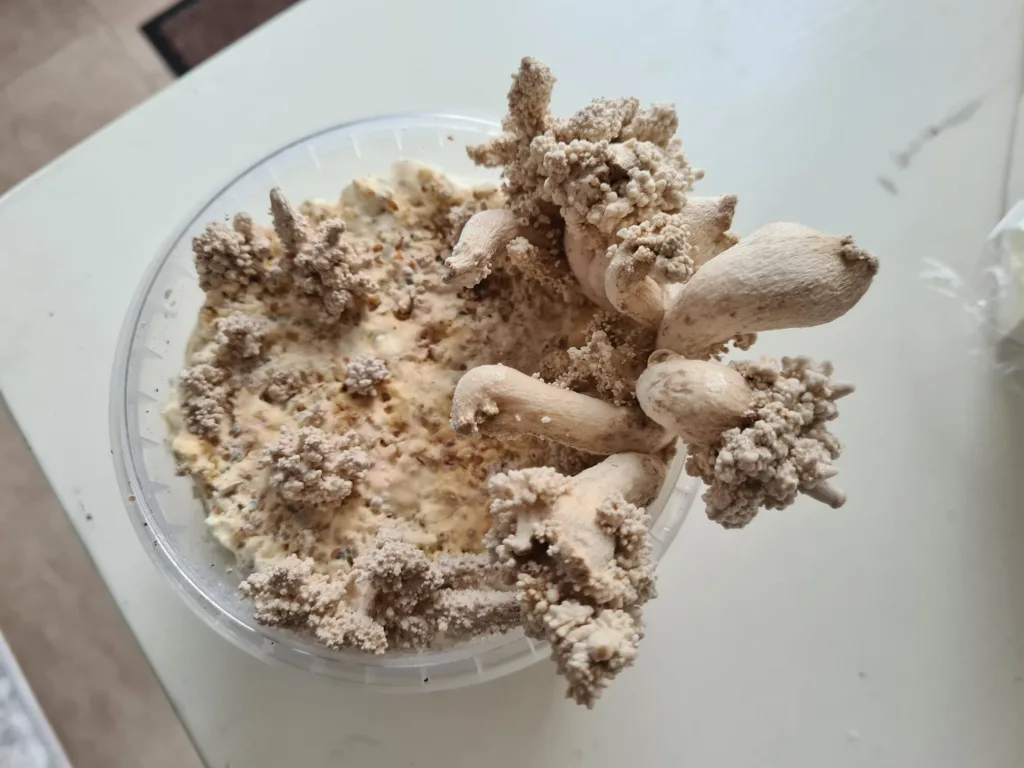
My mushroom growing adventure with Pilzpaket has been nothing but failures. The mushroom bags did not grow well and the mushroom were often rotting in the package before sprouting. I managed to get one harvest from one of the bags (Florida oyster mushroom). However, when I prepare the bags for its second growing, it started to grow something else than the mushroom.. I was very unsuccessful with the other grow bag with the “Limon Mushroom”. Some mushroom bodies started to sprout however the caps started turning brown and rot after a few days. I took the care not to get water to the underside of the mushroom, but still it did not stop the mushroom from going bad. After some point, even the fruiting body in the grow bag started to rot and the bag turned very mushy and smelly.
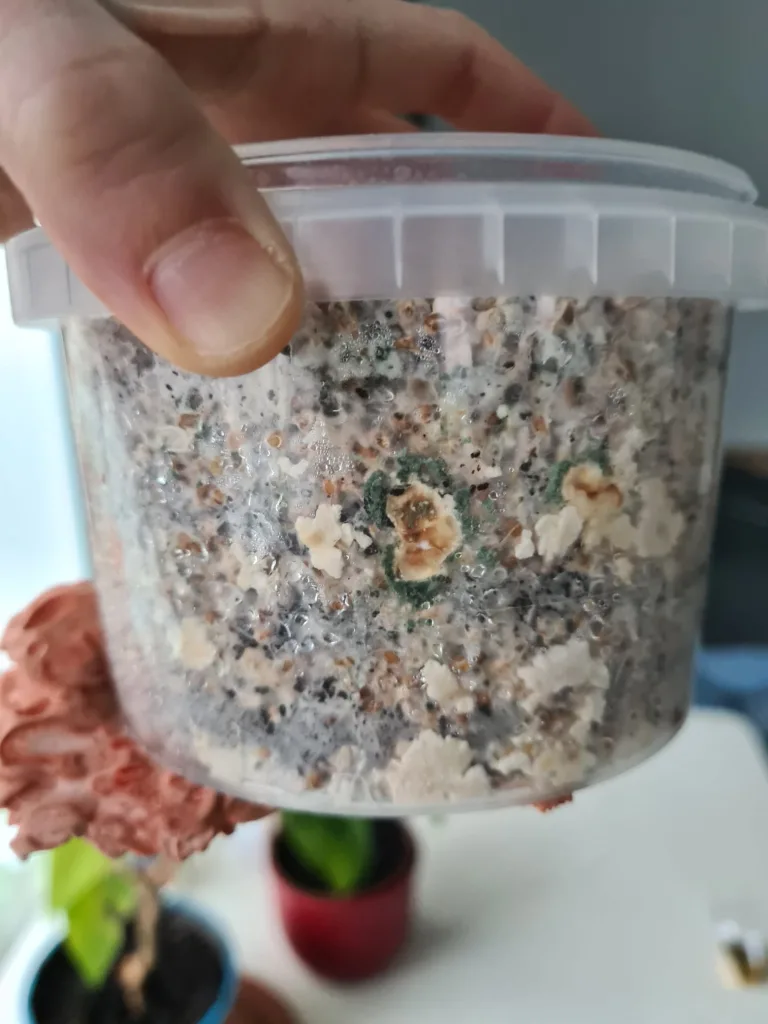
As for the flower pot with mushroom spawns, I did not have much luck in that as well! One of them started to growing but was infested by green mold after a while. Green mold is an absolute deal-breaker because it is also harmful to your health and the spores can spread to your other mushroom packs or food products. So it is always a good idea to throw them away. The other flower pot did not have a mold problem, but the mushrooms were strangely developed. For some reasons, the mushroom caps were not able to fully develop but just existed as tiny bubble-like features.
Well there you go. Here is my personal experiences with my first mushroom grow bags. My verdict is that, it is not as easy to grow your own mushroom as advertised. Maybe it is just pure bad luck or that my green thumb is only for other plants, but mushroom. I am willing to try again next time, but for now, I will close this chapter of my mushroom growing adventure and onward to the next project!

Navigating the Perplexities of Mushroom Substrate
There are many different types of substrates available to grow mushroom, depending on the species of mushroom, the company that produces the grow bags, what is available in your region etc. No matter the substrate, there are a few problems that you can potentially run into during your cultivation journey. Mold contamination, slow mycelium growth, or unusual odors can be encountered. But fear not! Each challenge is an opportunity to refine your skills. Troubleshoot with patience, and don’t hesitate to seek guidance from the vibrant online mushroom-growing community.
Parting words
Selecting the right substrate is a crucial step in the fascinating journey of growing mushrooms at home. Whether you opt for classic choices like vermiculite and brown rice flour or explore organic alternatives, each substrate has its unique charm. Embrace the process, learn from the perplexities, and relish the burstiness of growth. Happy cultivating!
FAQs
1. Can I reuse substrate?
Reusing substrate is not recommended, as it may harbor contaminants. For each cultivation cycle, use fresh, sterilized substrate.
2. How often should I mist the substrate?
The frequency of misting depends on the substrate’s moisture content. Aim for a balance—neither too dry nor too wet. Mist when the substrate surface appears dry.
3. Can I use garden soil as a substrate?
Garden soil is not suitable for mushroom cultivation due to its composition and the risk of contamination. Stick to specialized substrates for optimal results.
4. Is pasteurization necessary for all substrates?
Pasteurization is crucial for some substrates to eliminate competing microorganisms. Follow specific guidelines based on the substrate you choose.
5. What’s the best storage method for unused substrate?
Store unused substrate in a cool, dry place to prevent contamination. Seal it in airtight containers or bags until you’re ready for the next cultivation cycle.