Spruce up your balcony with DIY Projects
Are you looking to spruce up your balcony without breaking the bank? Look no further! Transform your outdoor space into a stylish oasis with some easy and affordable diy projects. From choosing a theme and color palette to adding greenery and creating a cozy seating area, this article will guide you through the steps to elevate your balcony into a sanctuary that reflects your unique style. Get ready to unleash your creativity and revamp your outdoor space with these budget-friendly tips!
Repurpose Furniture and Decor Items
One easy and affordable way to update your balcony decor is to repurpose furniture and decor items. Look around your home for pieces that could be given a new life in your outdoor space – an old wooden crate could become a rustic coffee table, a ladder could be transformed into a plant stand, or even mismatched chairs could be painted in coordinating colors to create a charming seating area. Get creative and think outside the box to give your balcony a unique and personalized touch.
By repurposing furniture and decor items, you can not only save money but also add character and charm to your balcony makeover. In Germany, people sometimes leave some furniture, shelves and books (even shoes!) on the side walk and they are all free to be taken home. When the weather is good, take a walk around your neighborhood and you’ll be surprised at the items that you might be able to find (I only speak about the experience in Germany!). Or you can go online to search for some secondhand items that are selling at a low price or sometimes even for free. In Germany, the go-to site is ebay kleinanzeigen.
To create a cozy seating area on your balcony, start by selecting comfortable seating options such as lounge chairs, benches, or a small bistro set. Consider adding cushions, throw pillows, and outdoor rugs to make the space inviting and cozy. You can also incorporate a small side table or a coffee table to hold drinks, books, or plants. By creating a comfortable and inviting seating area, you’ll be able to relax and enjoy your balcony oasis day or night.
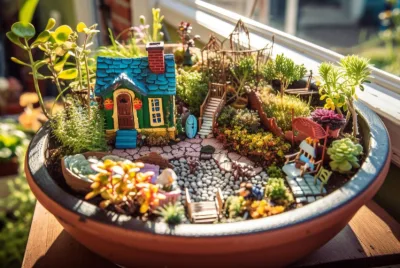
Add Greenery with Potted Plants and Vertical Gardens
Once you’ve revamped your existing pieces, you’ll be ready to move on to the next step of adding greenery with potted plants and vertical gardens. Vertical gardening is an excellent space-saving garden hack, especially when you do not have the luxury of a big garden. Creating a lush, natural environment on your balcony will not only enhance the visual appeal but also create a peaceful and relaxing atmosphere to enjoy.
How to do Vertical Gardening on the Balcony
- According to growth habits of Plants: Plants that naturally grow upwards, such as vine varieties like tomatoes, cucumbers, beans, and peas can easily be incorporated into vertical gardening. Additionally, herbs like basil, thyme, and mint can do well in vertical arrangements.
- Use Vertical Structures: Install trellises, arbors, or fences to support climbing plants. You can also repurpose items like pallets, ladders, or hanging shoe organizers to create vertical planting spaces.
- Stackable Planters: Invest in stackable planters or vertical garden kits designed specifically for small spaces. These systems allow you to grow multiple plants in a compact vertical arrangement.
- Hanging Baskets and Pots: Hang baskets or pots from hooks, rails, or the ceiling to utilize overhead space. This is ideal for trailing plants like strawberries, ferns, or petunias.
- Wall-mounted Planters: Install wall-mounted planters or create your own using containers attached to a sturdy frame. This is a great way to add greenery to walls both indoors and outdoors.
- Hydroponic Systems: Consider using hydroponic vertical gardening systems, which allow plants to grow without soil and can be stacked vertically to save space. These systems are ideal for growing herbs, lettuce, and other leafy greens indoors.
- Espalier Fruit Trees: Train fruit trees to grow flat against a wall or trellis using the espalier technique. This not only saves space but also creates a beautiful and productive garden feature.
- Utilize Tiered Shelving: Arrange plants on tiered shelves or plant stands to create a vertical garden display. This is especially effective for showcasing a variety of plant types while conserving floor space.
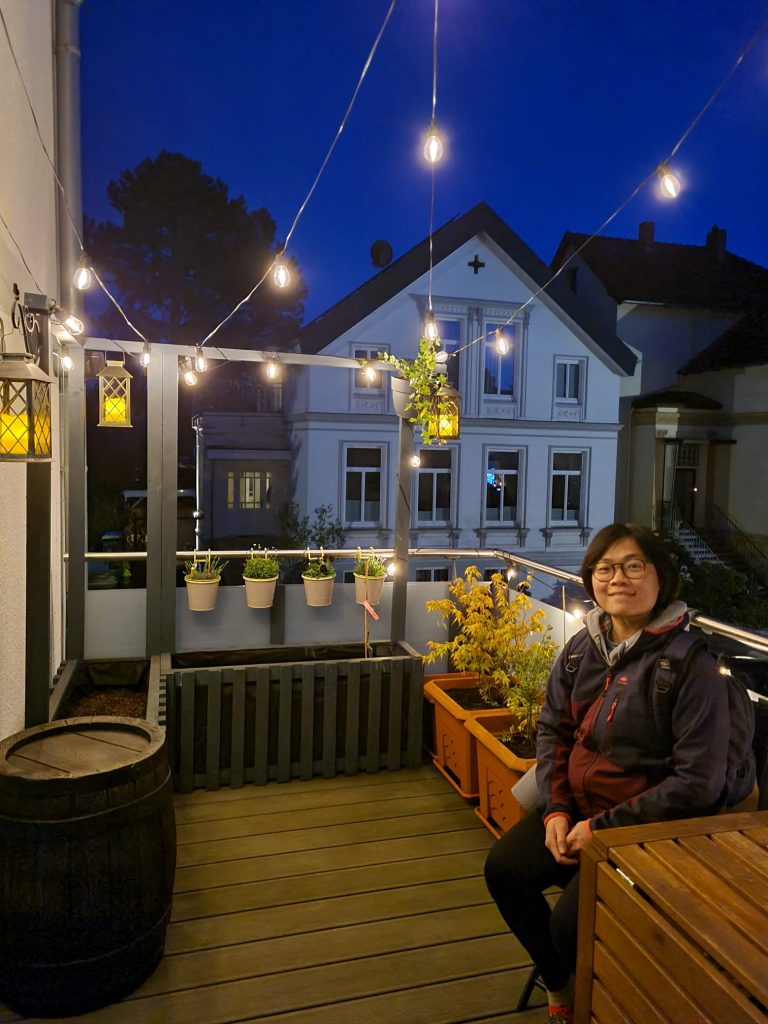
Light Up Your Space with String Lights and Lanterns
String light and lanterns can help to add a warm and inviting glow to your cozy seating area. String lights create a beautiful ambiance and can be easily draped across railings or hung from the ceiling. Lanterns add an extra touch of charm and can be placed on tables or hung from hooks. These simple additions not only illuminate your balcony but also create a magical atmosphere for relaxing or entertaining guests. With the soft glow of string lights and lanterns, your balcony will be transformed into a peaceful retreat where you can unwind after a long day.
These days, string light for balcony even comes with a small solar-power screen. Hence, you get beautiful lights for your balcony in the evening while doing a small part for the environment for using solar powered appliances. Win-Win!
My balcony makeover
Now it gets a bit boring to read on and on about how to improve your balcony space, what and how to plant and things to note. How about some real life, real time example on giving my balcony a make over?
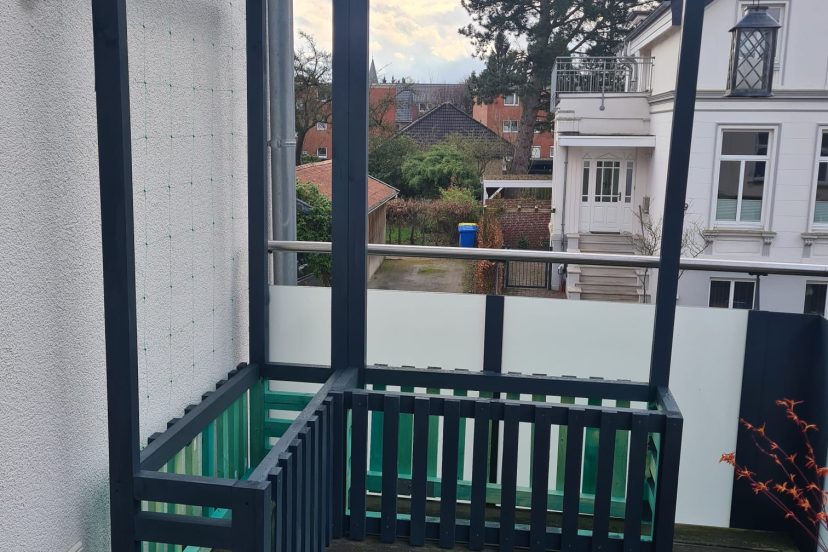
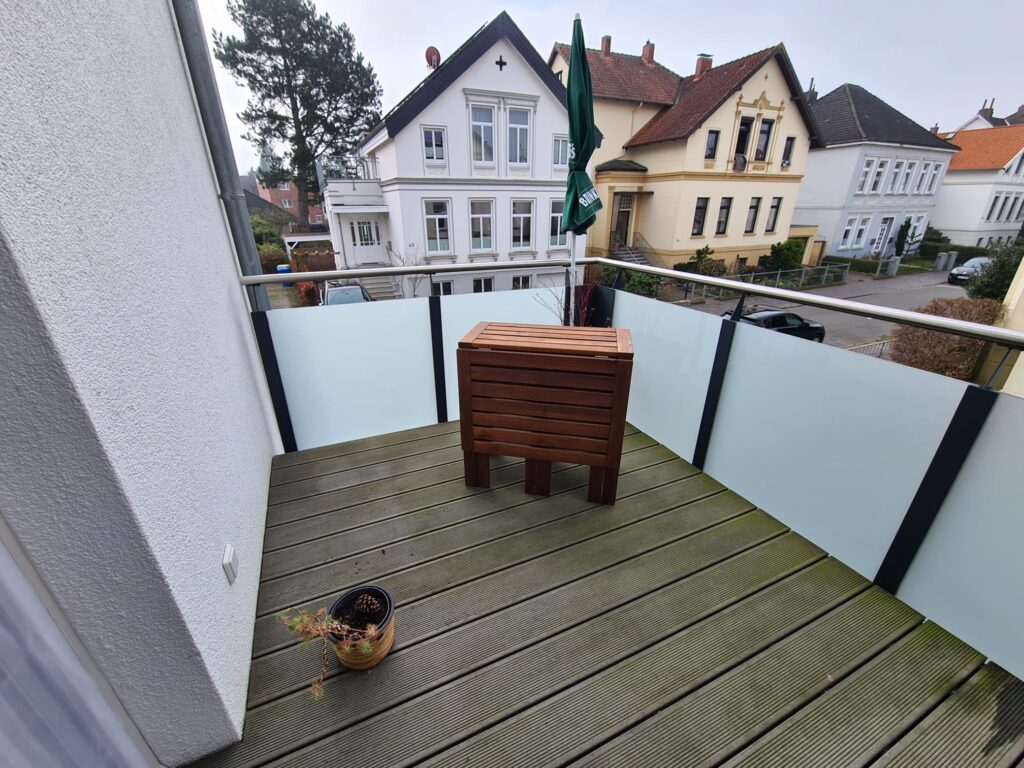
The beginning
When I moved into my new apartment, I was so excited because it came with a rather large south facing balcony! I was really excited to start some gardening projects on the balcony because it is a rare find to have an apartment with sufficient balcony space for gardening! I moved there last Autumn and it was already getting really cold and wet to do anything on the balcony. Now that Spring (an unusually warm Spring..) is here, and day light is getting longer again, it’s time to start our DIY projects, planting and making the balcony teeming with life and greenery!
Planning
Before I head into the hardware store to buy the materials needed for the balcony, I first made a rough sketch of the balcony and how I wanted some pots or raised bed to be located. Check out my previous post on balcony gardening 101 to get a detail guide of how to get started.
There are a few considerations before you start:
- Cost and your Budget: Let’s be honest, sprucing up the balcony takes time, effort and most realistically, money. Of course, I already listed some pointers above on how to do a makeover without breaking the bank. For any projects, always consider your financial situation and what is the priority. A self-watering pot seems like a great investment, and a life-saver (literally) for people who forgets to water their plants. However, those pots also come with a hefty price tag!
- Skills set: More often than not, DIY projects are cheaper than ready-available garden raised beds or garden furniture. Moreover, you get to insert your own personal touch and let your personal taste shine! However, not everyone has a full set of tools laying around for DIY projects and one also need some skills to operate the tools and build up the furniture for the balcony.
Materials for building
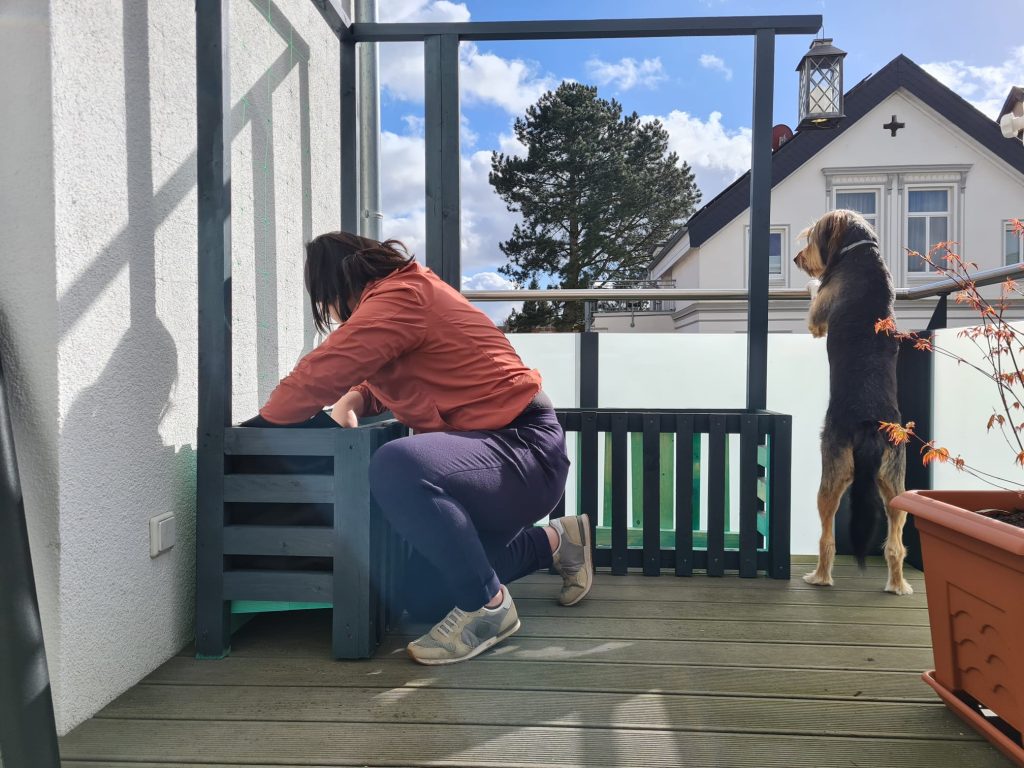
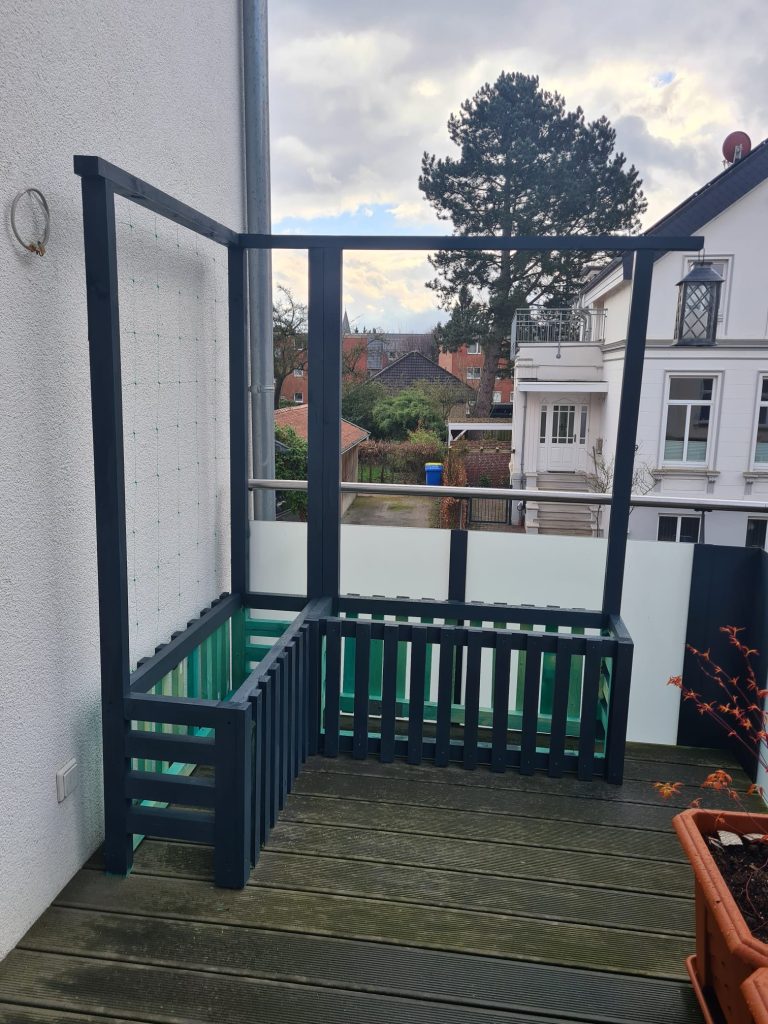
I decided to build my own raised garden bed because the ready-made commercialized raised bed (or Hochbeet in German) are too small in dimensions for my balcony space and quite expensive if I had to buy a few. For example, from one of the hardware shops, a raised bed of 150cm X 76 cm X 74 cm costs 90 Euros.
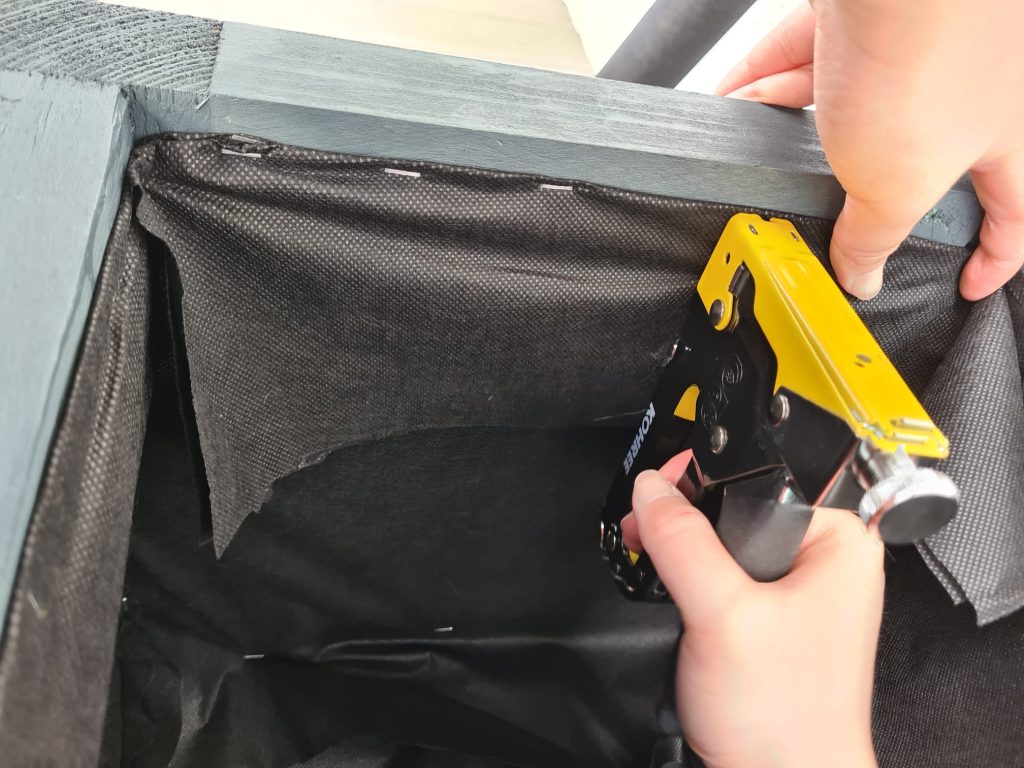
After taking some measurements of the balcony space, I decided that I will build two wooden containers that I will then fill up with soil for planting. It will also include a small trellis for the tomatoes and cucumber plants. The structure each has the dimensions of 30cm X 50cm X 100cm. For the build, I purchased pieces of pre-treated wood from the hardware store for a total of around 120 Euros. I also added an additional layer of paint (25 Euros) on the wood for extra protection against rain and moisture. To contain the soil, I stapled a sheet of cloth (15 Euros) that is most commonly used against weed growth in the garden. It is strong and durable, and also allows water to pass through to prevent waterlogging.
Soil for planting
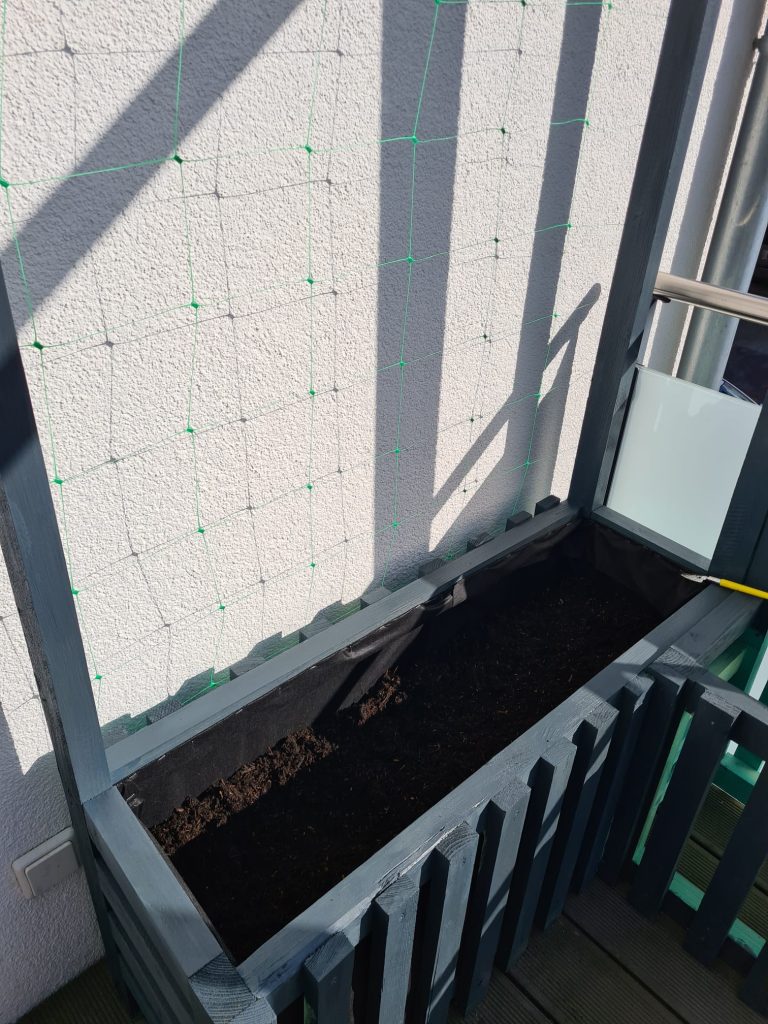
Once you have your raised bed ready, it is time to fill it up! Usually, you do not fill up the whole depth with compost since that will quickly be expensive. Instead, use the Hugelkultur method, that is very easy and cost-efficient way to fill up your raised beds. The base layer of the bed is a layer of cardboard. That will help to prevent weed from growing into your bed. Next, add coarse materials like rotting logs and branches that will decompose slowly, giving the bed a stable source of organic matter. The coarse materials also provides good drainage to prevent waterlogged soil. Next, smaller pieces like branches and sticks are added to fill the space between the larger logs. Grass clippings, straw, dried leaves and kitchen scraps are added as the next layer.
The final two layers are compost and top soil that you can start planting your fruits and vegetables. Your plants will get a constant and stable source of nutrients as the layers below decomposes slowly.
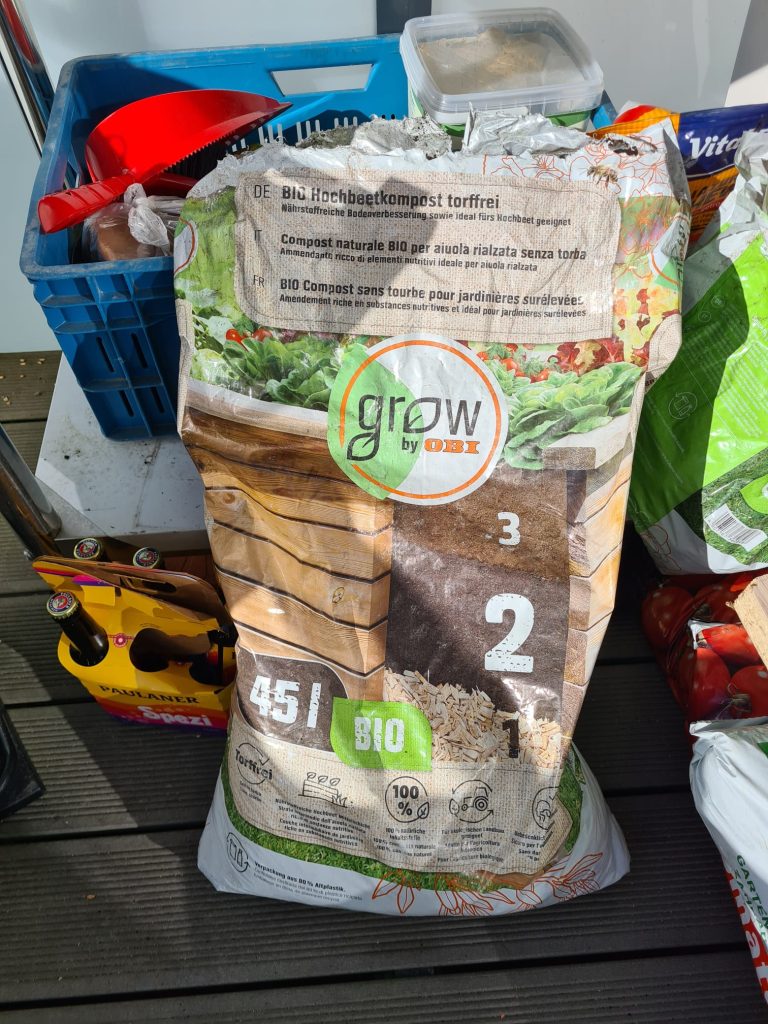
As the structure that I built is not so deep and large, I did not add any logs or branches as the base layer. Instead, I directly fill my containers with compost and top soil. In Germany, some soil packages comes with the numbers 1 (base layer – 8 Euros for 45 liters), 2 (compost – 10,50 Euros for 45 liters) and 3 (top soil – 9 Euros for 45 liters) to guide the consumers on how to fill up their raised garden beds.
Final touches
I also bought some planter boxes that you can hang over the railings of the balcony to plant some bee-friendly flowers, strawberries and herbs. To make the balcony cozy and a touch of fairytale ambiance, I bought some solar-powered string lights and lanterns that made the balcony looked so magical in the night.
Conclusion
Transforming your balcony into a stylish outdoor oasis doesn’t have to cost a fortune. By choosing a theme and color palette, repurposing furniture, adding greenery, creating a cozy seating area, and lighting up your space, you can unleash your creativity and elevate your outdoor sanctuary. So get started today and make your balcony a reflection of your unique style. As the saying goes, “Creativity is intelligence having fun.”
Stay tuned for more updates as I start my urban gardening advantage on my balcony!