Bell Pepper Growing Stages: Watch the colour change!

Deprecated: The PSR-0 `Requests_...` class names in the Requests library are deprecated. Switch to the PSR-4 `WpOrg\Requests\...` class names at your earliest convenience. in /home/littlegr/public_html/wp-includes/class-requests.php on line 24
Bell peppers are not only a delicious snack but also very easy to grow! They come in a variety of colours as well. But have you ever wondered if the different colours of the bell peppers are different plants? I know I did as a child. Now that I am more knowledgeable around the garden, I’m thrilled to take you on a journey through the fascinating world of bell pepper growing stages. From the vibrant green hues to the rich reds, yellows, and oranges, bell peppers undergo a remarkable transformation that not only adds visual appeal to your garden but also hints at their changing flavors and nutritional profiles.
What are Bell Peppers?
Bell peppers, scientifically known as Capsicum annuum, are colorful and versatile fruits that belong to the nightshade family. While commonly treated as vegetables in culinary contexts, botanically, they are fruits. Bell peppers come in various colors, including green, red, yellow, and orange, and each color represents a different stage of ripeness. Here is a quick run down on bell pepper growing stages:
1. The Seedling Stage
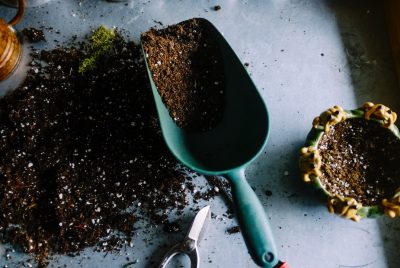
The bell pepper journey starts with a humble seed. Select high-quality bell pepper seeds from a reputable supplier or saved from a previous successful crop. Consider the specific variety of bell pepper you want to grow, as different cultivars offer varying flavors, sizes, and colors.
Germination
- Start the germination process indoors using a seed tray, approximately 8-10 weeks before the last expected frost in your region.
- Plant the seeds in a seed-starting mix, ensuring good drainage.
- Cover the seeds lightly with soil and maintain consistent moisture.
- Place the seed trays or pots in a warm location, around 70-80°F (21-27°C).
- Ensure adequate sunlight or provide artificial light using grow lights to promote healthy seedling growth.
2. The Vegetative Stage
Once the seedlings take root and develop a few sets of true leaves, they are sturdy enough to handle and be transplanted into individual pots with nutrient-rich potting soil. If you plan to transplant the seedlings to your outdoor garden, you need to start the hardening-off process about 7 – 10 days in advance. Gradually expose the seedlings to outdoor conditions, starting with a few hours of sunlight and increasing the time each day.
Choose a sunny location with well-draining soil for transplanting your bell pepper seedlings. Lush green leaves begin to flourish, and the plant focuses on building a robust structure. During this period, it’s crucial to ensure your bell peppers receive the right balance of nutrients, particularly nitrogen, to foster healthy leaf and stem development. Keep the soil consistently moist but not waterlogged. Bell peppers prefer slightly damp conditions. Some bell pepper varieties may benefit from staking or support as they grow and produce fruit.
3. Flowering Time
As your bell pepper plant matures, it transitions into the flowering stage. Bell pepper flowers are usually small white to yellow star-shaped blooms. Bell pepper flowers can self-pollinating, meaning that you can still get fruits even if you just have one plant. However, they dop benefit from pollinators like bees, or a gentle shake of the plants can aid in the transfer of pollen between the flowers, potentially improving the fruit-setting process.
4. Fruit Setting
After successful pollination, the flowers give way to tiny peppers, signaling the onset of the fruit-setting stage. Not all flowers will produce a fruit and it is completely normal! Sometimes, bell pepper plants may experience blossom drop, where flowers fall off before fruit sets. This can be due to stress factors such as extreme temperatures, inadequate pollination, or nutrient imbalances. Ensuring stable growing conditions can help mitigate this issue.
With enough sunlight and nutrients, bell peppers grow quickly once they begin to form. With each passing day, you should be able to notice that the fruits are getting bigger and reach their mature size.
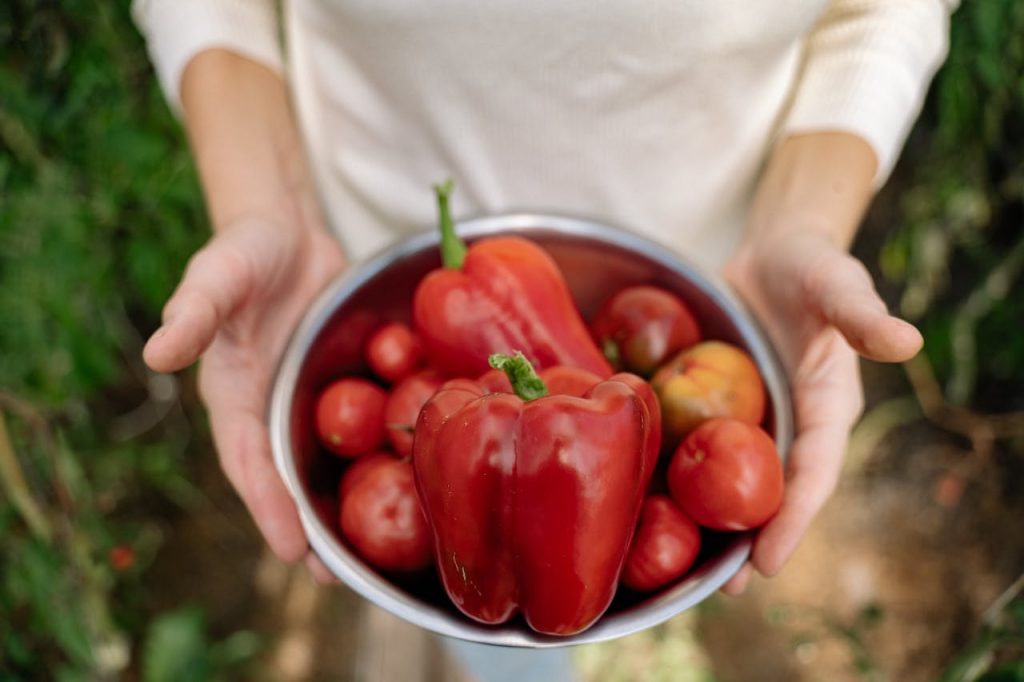
5. Green Bell Peppers: The Early Harvest
The first color of your bell peppers is green. As long as the bell peppers reach their mature size, harvesting at this stage is entirely possible. Green bell peppers boast a crisp texture with a slightly bitter flavor. They are perfect for salads, stir-fries, or as crunchy additions to your favorite dishes. If your plants are producing smaller fruits, you may want to prune away some of the fruits to encourage larger peppers.
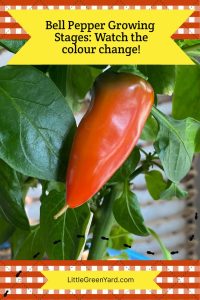
6. Maturation Process: Turning Red, Yellow, or Orange
Here comes the colour transformation! If you’ve ever wondered whether different colored bell peppers come from distinct species, the answer is no. Not everyone is aware of this but all green bell peppers will eventually change to red. The colours merely indicate the level of ripeness. From green, they transition to shades of red, yellow, or orange, depending on the specific cultivar. This change isn’t just about aesthetics; it signifies a shift in taste and nutritional content. Red bell peppers, for instance, are fully ripened and boast a sweeter, fruitier flavor compared to their green counterparts.
7. Harvesting Tips: Timing is Everything
To ensure the best taste and nutritional value, timing is crucial when harvesting bell peppers. Waiting for the peppers to fully mature on the plant enhances their sweetness and flavor, however it also means that they will spend more time on the plant and be exposed to diseases and pests. Be sure to address these issues to avoid losing your bell peppers. To harvest your peppers, gently twist the peppers off the plant, taking care not to damage the stem or surrounding foliage.
Time to feast!
Here’s a delightful and easy-to-make recipe for Roasted Red Pepper and Tomato Soup with Grilled Cheese Croutons:
Ingredients:
For the Soup:
- 4 large red bell peppers, halved and seeds removed
- 6 ripe tomatoes, halved
- 1 large onion, chopped
- 4 cloves garlic, minced
- 4 cups vegetable broth
- 2 tablespoons olive oil
- 1 teaspoon dried thyme
- Salt and pepper to taste
- 1/2 cup heavy cream (optional, for a creamy texture)
- Fresh basil or parsley for garnish
For the Grilled Cheese Croutons:
- 4 slices of your favorite bread
- 1 cup shredded cheddar cheese
- Butter for spreading
Instructions:
- Roast the Vegetables:
- Preheat your oven to 400°F (200°C).
- Place the halved red bell peppers and tomatoes on a baking sheet, cut side up.
- Drizzle with olive oil and sprinkle minced garlic over the vegetables.
- Roast in the oven for about 30-40 minutes or until the peppers are charred and the tomatoes are soft.
- Prepare the Soup Base:
- In a large pot, sauté the chopped onion in olive oil until translucent.
- Add the roasted red peppers and tomatoes, along with any juices from the baking sheet.
- Pour in the vegetable broth, add dried thyme, salt, and pepper. Bring to a simmer and let it cook for about 15-20 minutes.
- Blend the Soup:
- Use an immersion blender or transfer the soup to a blender in batches. Blend until smooth.
- If you prefer a creamy texture, stir in the heavy cream at this point.
- Make Grilled Cheese Croutons:
- While the soup is simmering, make the grilled cheese croutons.
- Butter one side of each bread slice and place the cheese between two slices, butter side out.
- Grill the sandwiches in a pan over medium heat until the bread is golden brown, and the cheese is melted. Let them cool slightly and then cut them into crouton-sized pieces.
- Serve:
- Ladle the hot soup into bowls, garnish with fresh basil or parsley, and top with grilled cheese croutons.
- Enjoy your delicious and comforting Roasted Red Pepper and Tomato Soup!
This soup is not only a feast for the senses but also a comforting and satisfying meal, perfect for any time of the year.
Conclusion
In conclusion, witnessing the bell pepper growing stages is a rewarding experience for any gardening enthusiast. From the tiny seedling to the burst of colors, each stage tells a story of growth, flavor development, and nutritional richness. Remember, the key to the perfect bell pepper is patience and attentive care throughout its journey from seed to harvest.
FAQs
- Can I grow bell peppers in pots?
- Yes, bell peppers can thrive in pots, provided you use well-draining soil and provide ample sunlight and nutrients.
- How long does it take for bell peppers to change colozr?
- The transition from green to red, yellow, or orange typically takes several weeks, with factors like temperature and sunlight influencing the process.
- Are there any pests that I should be aware of during the growing stages?
- Common pests include aphids and whiteflies. Regularly inspect your plants and use natural remedies like neem oil to deter pests.
- Can I eat bell peppers at the green stage?
- Absolutely! Green bell peppers have a distinct flavor and are perfect for certain dishes. However, allowing them to ripen further adds sweetness.
- What is the best time to plant bell pepper seeds?
- Start seeds indoors 8-10 weeks before the last expected frost date for your region. This gives the plants ample time to establish before transplanting outdoors.